How to send file from localhost to AWS EC2 using NiFi Site-to-Site?
27 Jan 2017 | NiFiThis post describes how to use NiFi Site-to-Site protocol to transfer data from localhost to a remote NiFi instance running on an AWS EC2.
Let’s make it cheap
As a NiFi developer, there’s demand to create various environment, not only NiFi, but also databases, search engines, Hadoop, web servers, proxies … etc. VM and Docker containers are handy but sometimes I need to create environment at lower level to investigate certain type of issues.
These temporaly server instances should be less expensive, so that I can experiment different environments with more try and error processes. EC2 Spot instance is the best thing for this need.
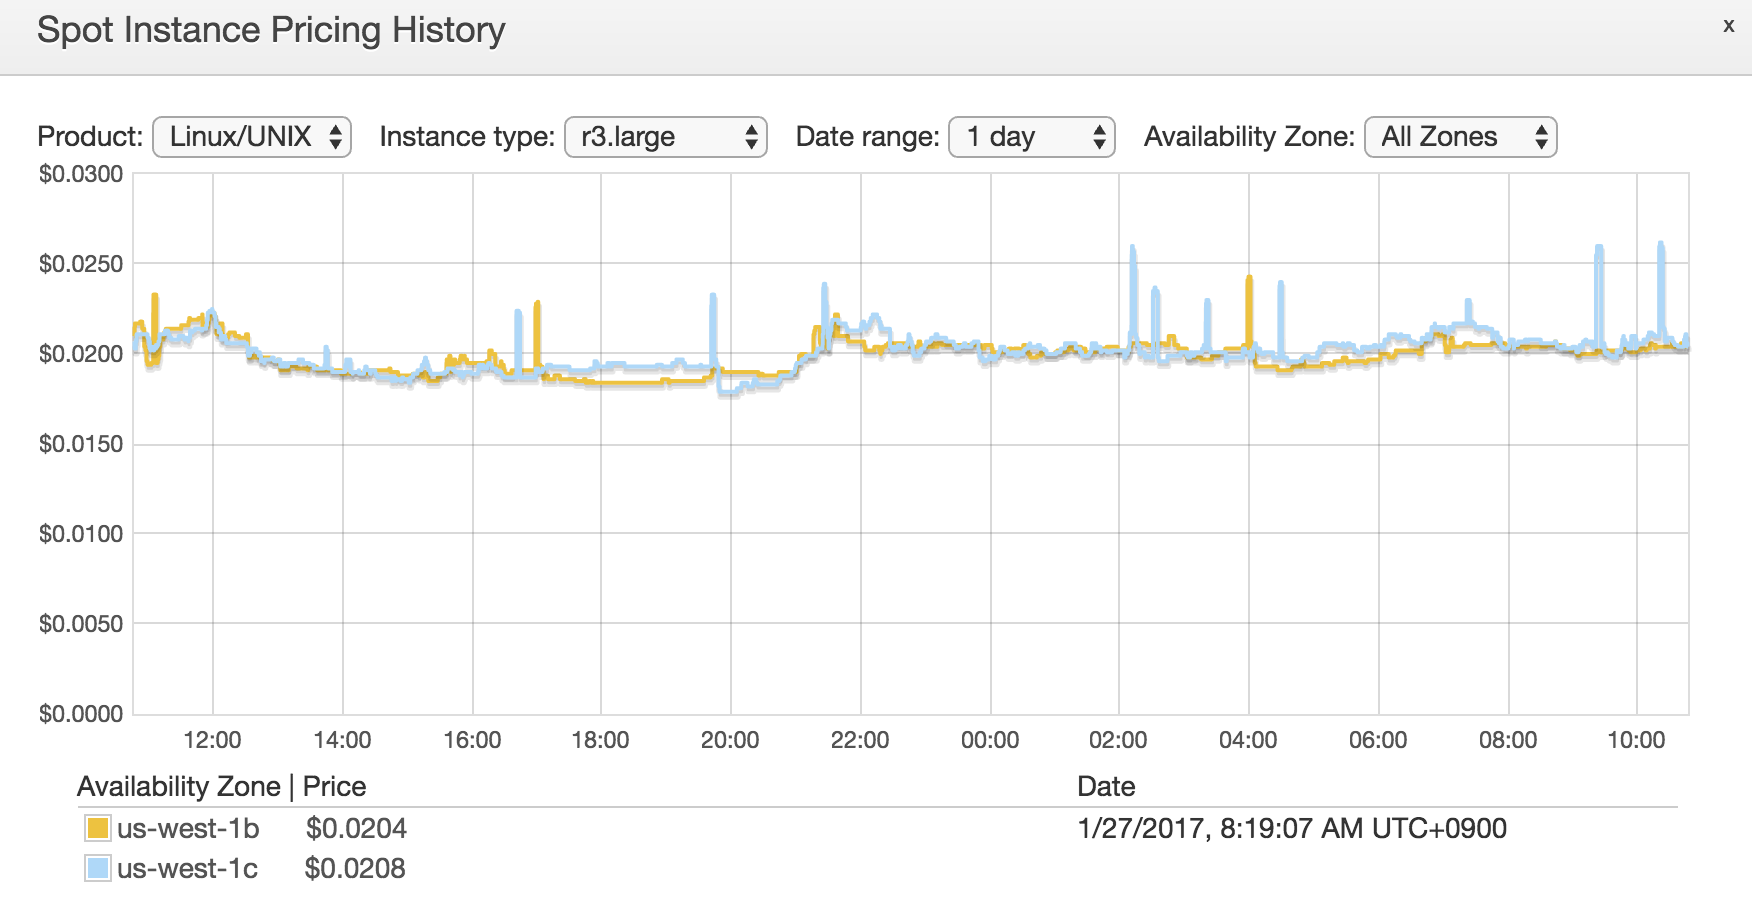
For example, r3.large (which is cost effective one, for NiFi, I think) is just less than $0.025/hour! Just 2 JPY/h!
Let’s make it secure
Even though it’s not a production environment, I want it to be secure with least effort.
Security Group can restrict access to specific port, and it has My Ip option for source IP.
Let’s make one for NiFi so that I can send file from localhost to a EC2 instance over Site-to-Site protocol, only from the ip address that I’m using.
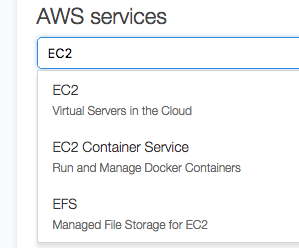
First, go to AWS console:
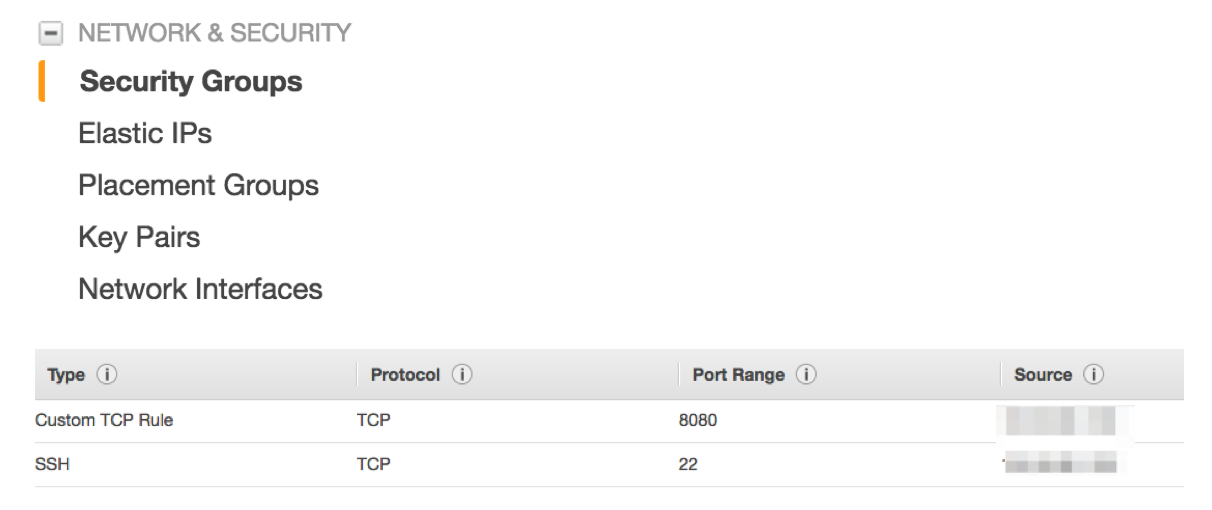
Then select Security Groups from the left pane, and create security group. Let’s open port 22 for SSH access, and 8080 for HTTP which is used to access NiFi web UI and also Site-to-Site protocol. Restrict access from My IP:
For this example, security group is the only security mechanism that I used, but NiFi has built in AuthN and AuthZ features. Please check NiFi, Authentication and Authorization if you’re interested in more detail.
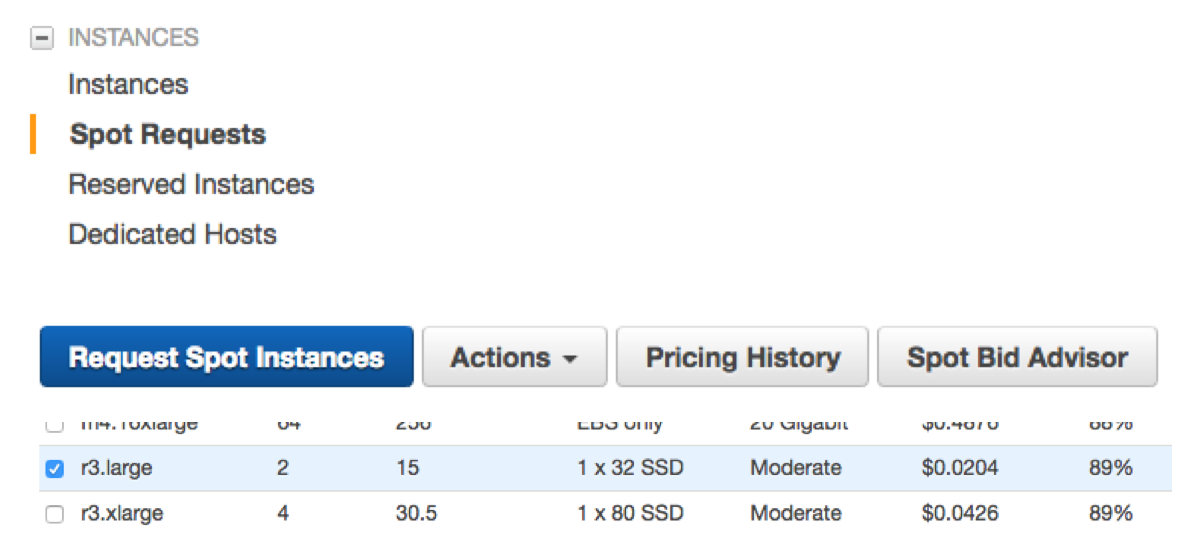
Create Spot request
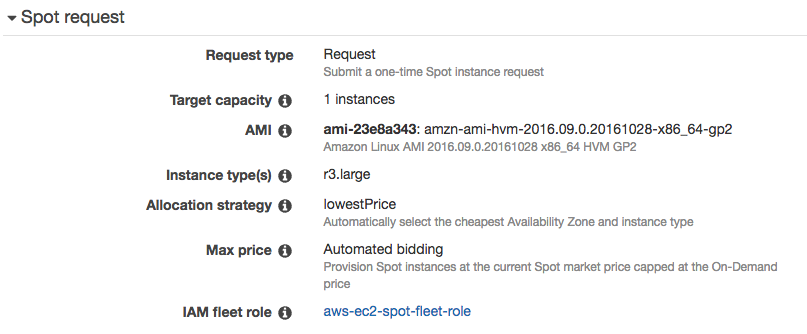
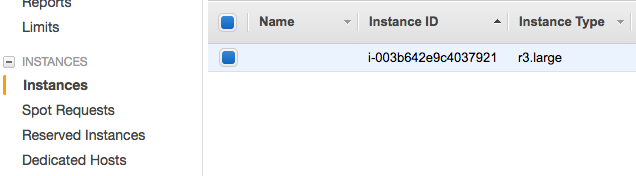
Next, let’s create a Spot request. r3.large has 2 cores and 15 GB of RAM, so it’s good for moderate NiFi workload.
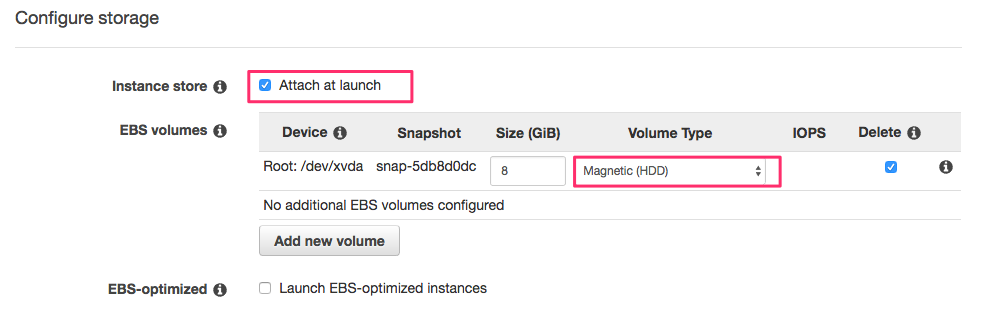
When configuring storage, don’t forget to enable Attach at launch. Selecting HDD can be cheaper, as I’m going to install NiFi on the instance store, I don’t need SSD for the root device.
A key pair needs to be specified. This key is needed for SSH login.
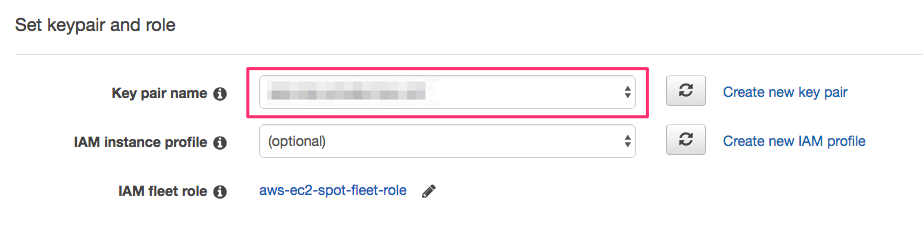
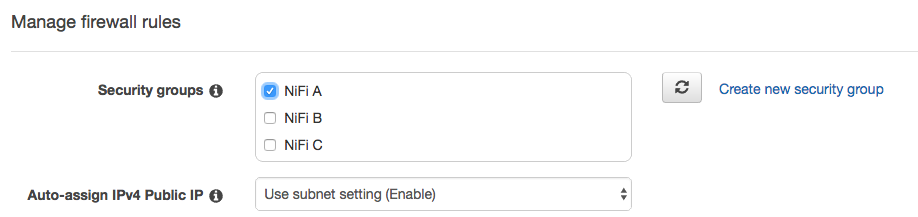
Let’s choose a Security group that I created earlier (port 22 and 8080 are open). I have few security groups, for deploying multiple NiFi clusters communicating with each other with different situations.
At the end of the wizard, Spot request summary looks like this:
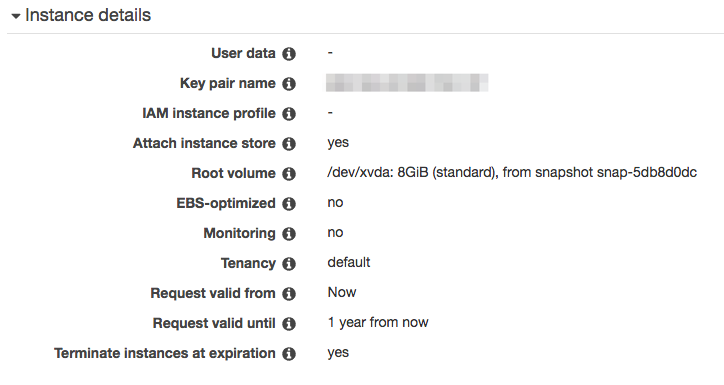
Submit the request and wait for few minutes then it will be ready! Using AWS CLI tool makes it’s easy to recreate the same request.
Setup EC2 instance
Once the EC2 instance is ready, let’s get its public IP needed to SSH. It can be seen from here:
Then, let’s add the IP address to hosts file on localhost. Using consistent naming rule would make your daily life easier.
E.g: <id>.<service>.<location>.mine, in this case, a.nifi.aws.mine.
After logged into the server instance, let’s install Java 8.
Installing Java 8
NiFi 1.0 or later requires Java 8:
$ ssh ec2-user@a.nifi.aws.mine
$ sudo su -
$ yum install -y java-1.8.0-openjdk
# Choose 1.8
$ alternatives --config java
Mount instance store
The instance store have to be mount manually, details are written in AWS document, but in short:
# Find out block device
$ lsblk
# Create file system
$ mkfs -t ext4 /dev/xvdca
# Mout the instance store
$ mount /dev/xvdca /mnt
Install NiFi
Let’s install NiFi on the instance store:
$ cd /mnt
$ wget http://www-us.apache.org/dist/nifi/1.1.1/nifi-1.1.1-bin.tar.gz
$ tar xvf nifi-1.1.1-bin.tar.gz
$ cd nifi-1.1.1

# Edit configuration
$ vi conf/nifi.properties
The only configuration needs to be edit is nifi.remote.input.host.
Configure it with a hostname which is accessible from localhost.
Without specifying nifi.remote.input.host, NiFi will introduce it to Site-to-Site client as ‘localhost’ or the one hostname command returns.
On EC2, that will be something like ip-172-31-9-89, and it’s not accessible from other network.
So, we need to specify hostname to make Site-to-Site work across different networks.
# Site to Site properties
nifi.remote.input.host=a.nifi.aws.mine
nifi.remote.input.secure=false
nifi.remote.input.socket.port=
nifi.remote.input.http.enabled=true
nifi.remote.input.http.transaction.ttl=30 sec
Once these settings are done, let’s start NiFi:
$ ./bin/nifi.sh restart
Similarly, install NiFi on localhost, too. It’s just downloading the binary, extract it, then run nifi.sh.
Connect Localhost and Cloud using NiFi
Create remote NiFi flow
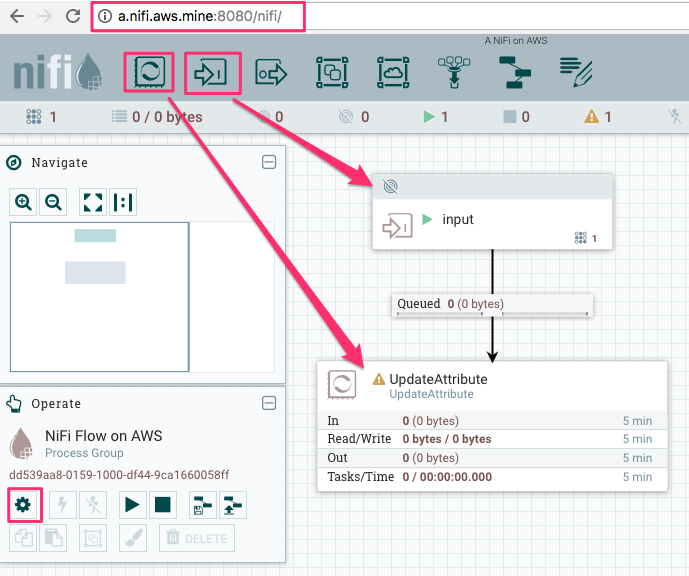
As I opened the port 8080 at EC2 security group, and add the instance public IP to hosts file on localhost, I can access Web UI of NiFi running on EC2 from localhost browser.
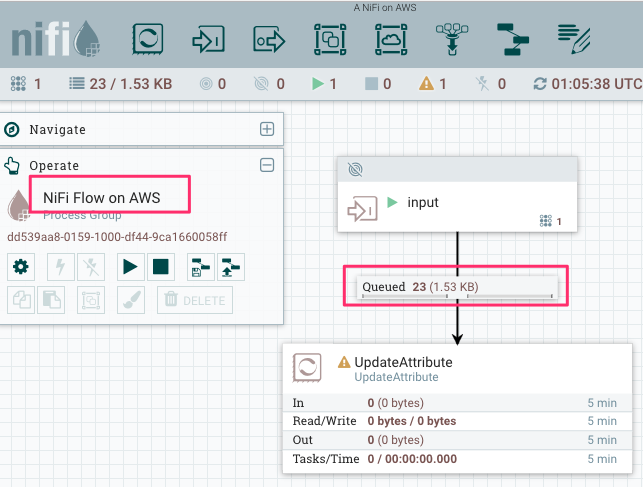
You can change the name of NiFi flow from the gear icon at the left bottom of the screenshot. Let’s deploy an Input port passing incoming flow files to UpdateAttribute. This UpdateAttribute processor is there just for queueing flow files up to debug.
Create local NiFi flow
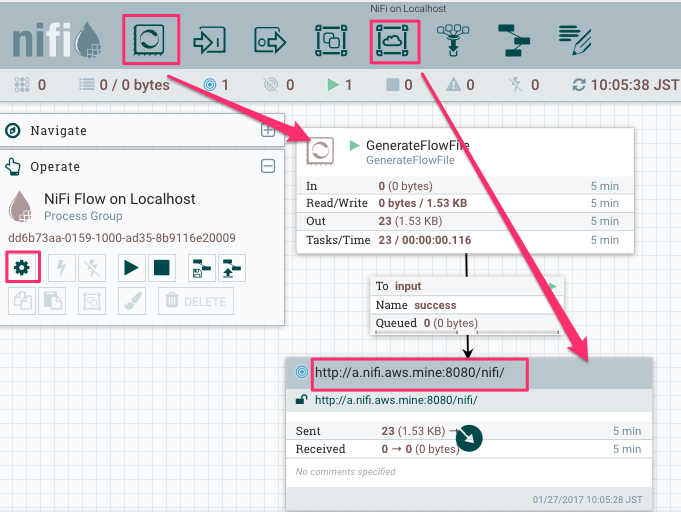
Let’s use GenerateFlowFile as always. It becomes more handy since it supports Custom Text property so that users can
specify text content to generate flow file with. I set Run Schedule to 5 sec to keep my network bandwidth usage low.
Then deploy a Remote Process Group (RPG), and set Transport Protocol to HTTP, and URLs to remote NiFi’s URL,
which is the same one you’d use to view the UI of remote NiFi from browser.
It may take few seconds for the RPG to get the remote NiFi’s topology and available port information. Once those information is ready, we can connect relationship from other processors. Connect GenerateFlowFile to input port.
Then right click the RPG and select Enable Transmission.
Start GenerateFlowFile as well, then those are sent to the remote NiFi running on EC2!
On remote NiFi UI, flow files received via the input port can be seen in the queue:
When local NiFi can not communicate with remote NiFi
In this post, I wrote up steps needed for two NiFis on local and EC2 communicate with each other. But for users who have issues with making it work as expected, here is a list of things to check:
- EC2 Security Group: for other NiFi to connect via Site-to-Site, the port configured with
nifi.web.http.port(defaults to 8080) on the remote NiFi needs to be opened if RPG is configured to useHTTPas transport protocol. - Likewise, for
RAW, the port configured withnifi.remote.input.socket.porton the remote should be opened. Since additional port needs to be opened, HTTP is recommended over RAW protocol in this case. - The URLs in RPG is the same remote NiFi URL, which you’d use to access remote NiFi UI from a browser.
- Input Port or Output Port should be started to receive Site-to-Site client access.
- Is the remote hostname is accessible from client machine? This can be checked with following cURL command:
$ curl -H 'x-nifi-site-to-site-protocol-version: 1' 'http://a.nifi.aws.mine:8080/nifi-api/site-to-site/peers'
This would return:
{"peers":[{"hostname":"ip-172-31-9-89","port":8080,"secure":false,"flowFileCount":0}]}
This REST endpoint is used from Site-to-Site client, to determine remote NiFi cluster topology.
Please check hostname and port in peers in the response. Is it accessible from client machine? Site-to-Site client can see available port lists, but won’t be able to make transaction to send data if this hostname and port are not accessible.
You already know where to configure to fix this? Very well, you are a good reader!
Summary
In this post, I described how to use EC2 spot instance to minimize cost for experimentations, and how to configure remote and local NiFi instance to transfer data.
NiFi Site-to-Site can be used not only for sending data from local to cloud, but also receiving data from remote to local, or sending from multiple local machines … etc.
Thanks for reading, please let us know if you encountered any issue with NiFi, from NiFi users mailing list!